The Microsoft Graph API is very powerful and can be valuable within in your Power Automate flows. But before you can use the MS Graph API in your flows, you need to prepare the authentication for the MS Graph API.
This guide shows you step by step how to setup the authentication for the usage of the Graph API in Power Automate.
Let’s dive into Microsoft Graph API Authentication for our flows!
Overview: Configuration of MS Graph API for Power Automate
There are 4 steps you need to finish, before the Graph API can be used:
- Register an application in the MS Azure Portal
- Create a client secret in the MS Azure Portal for your app
- Assign and grant API permissions to your app in the MS Azure Portal
- Configure your Power Automate flow to authenticate to MS Graph API
Step by step: How To Setup MS Graph API Authentication For Power Automate
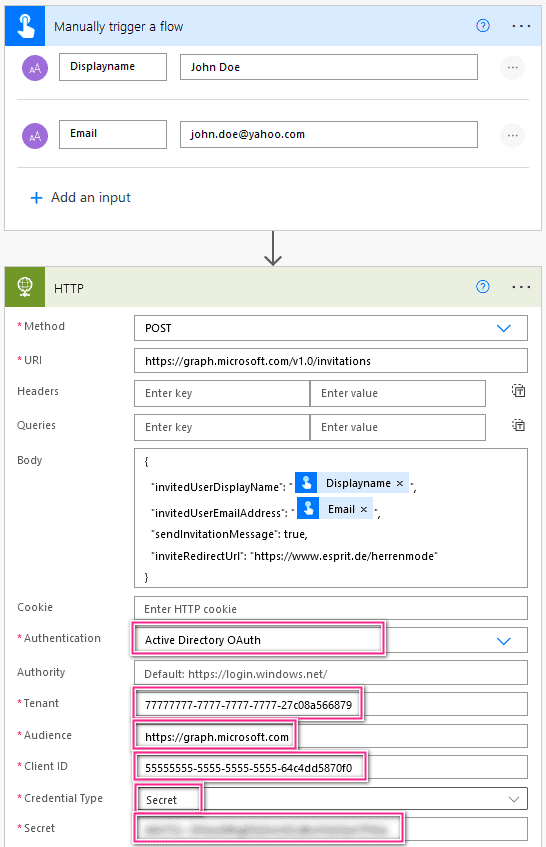
Learn step by step how to setup the authentication needed to use the Microsoft Graph API within a Power Automate flow.
-
Visit the Microsoft Azure Portal and add a new ‘App registration’
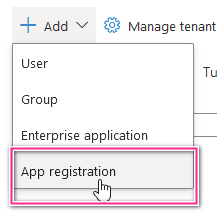
MS Azure Portal – Add App registration
-
Provide a name, select the Single tenant option, click Register
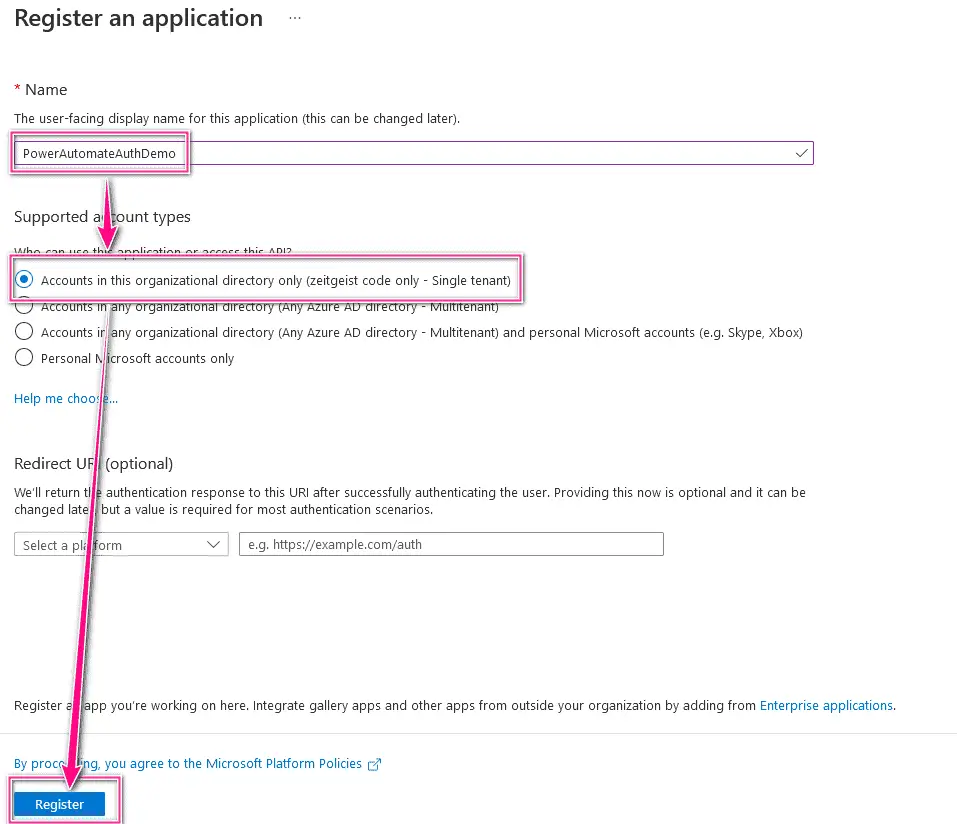
Azure Portal – Register an application
-
Copy Application and Directory ID to text editor and click on ‘Add a certificate or secret’

Azure Portal – New Application
-
Click on ‘New client secret’
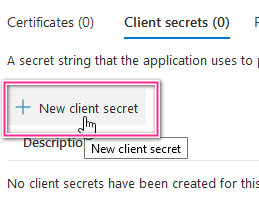
Azure Portal – App client secrets
-
Provides a descriptive name and how long the secret should be valid, click ‘Add’
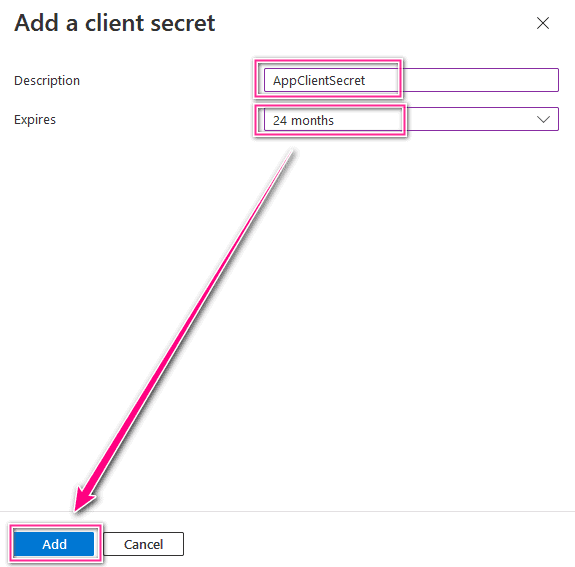
Azure Portal – Add a client secret
-
Copy ‘Value’ and ‘Secret ID’ to a text editor

Azure Portal – Client secret
-
Click on ‘API permissions’
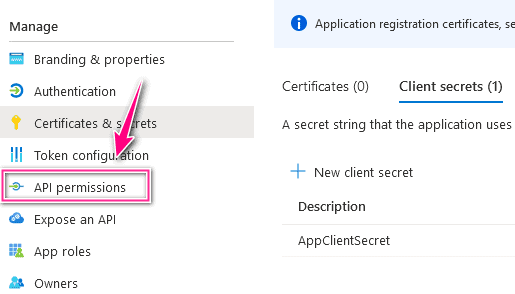
Azure Portal – API permissions
-
Click ‘Add a permission’
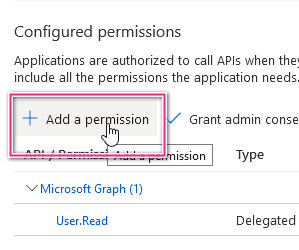
Azure Portal – Add a permission
-
Click on ‘Microsoft Graph’
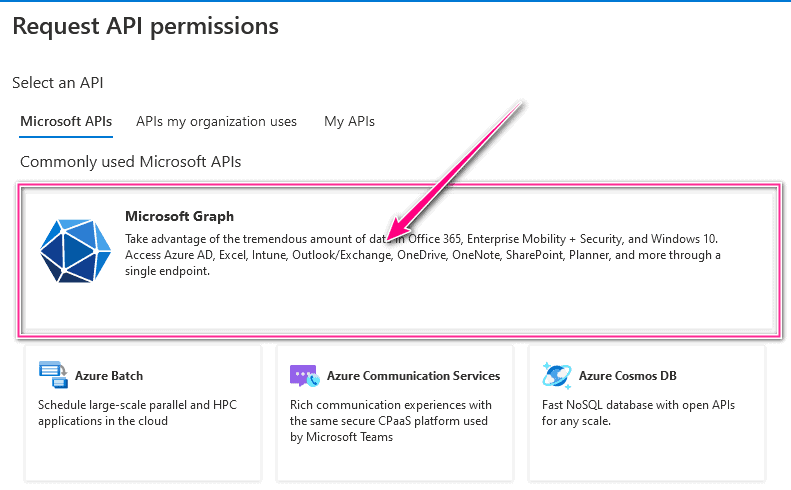
Azure Portal – Request API permissions
-
Click on ‘Application permissions’

Azure Portal – Request API permissions
-
Add the permissions you need (example: User.Invite.All) and click ‘Add permissions’
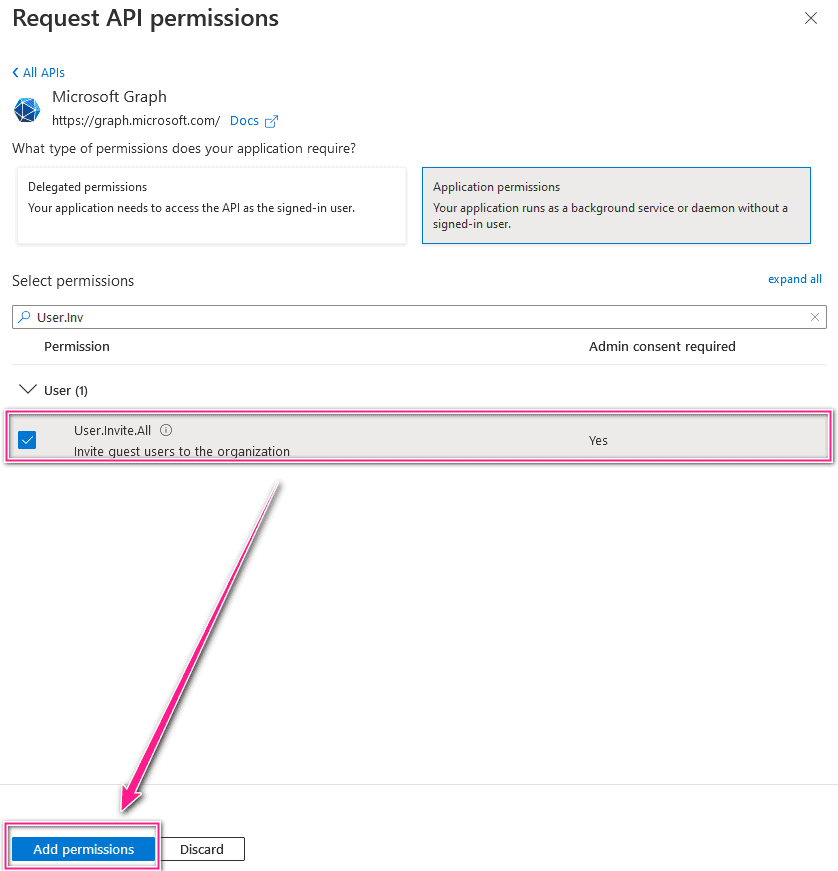
Azure Portal – Request API permissions – Add permissions
-
Grant admin consent for your permissions or ask your admin to do it
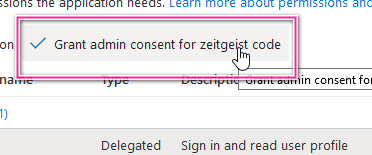
Azure Portal – Request API permissions – Grant admin consent
-
Finally you have everything to setup your Power Automate flow

Power Automate – HTTP Action – MS Graph API Configuration (Tenant & Client ID of Step 3 and Secret ID of Step 6)
