When a trigger should be triggered only, when a certain condition is met, Power Automate trigger conditions are the best solution. Unfortunately they are hidden at the bottom of the settings dialog of the trigger.
Even if you find them, formulating an expression that does fit your requirements is not as easy. In this article I like to help you to writing your own trigger conditions.
What are Power Automate Trigger Conditions
Every Power Automate flow needs a trigger event to get started. Power Automate offers a wide range of triggers. Just a few examples for triggers: a HTTP call, an incoming email or a new entry in a SharePoint list. With trigger conditions you can provide additional rules for when to trigger your flow.
As an example, let’s say you store orders in a SharePoint list and you want to be emailed every time an order is created with total value above $100. To achieve this you can define the following:
- Trigger: When a new item is created in your order SharePoint list
- Trigger condition: When column ‘total amount’ of the new entry is greater than 100
The trigger conditions are defined in expressions that need to evaluate to true or false. In case of true the trigger is triggered, for false it is not started.
Note that you can have multiple trigger conditions that need to be true to trigger the flow.
Power Automate Trigger Conditions Example
Here is a simple example how to use a power automate trigger conditions.
How To Create A Power Automate Trigger Condition
-
Create a new flow
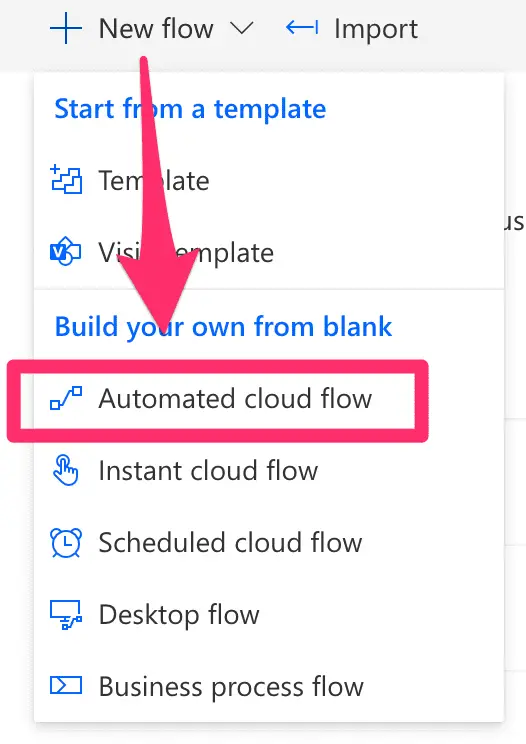
New flow
-
Select trigger type: Manually trigger a flow
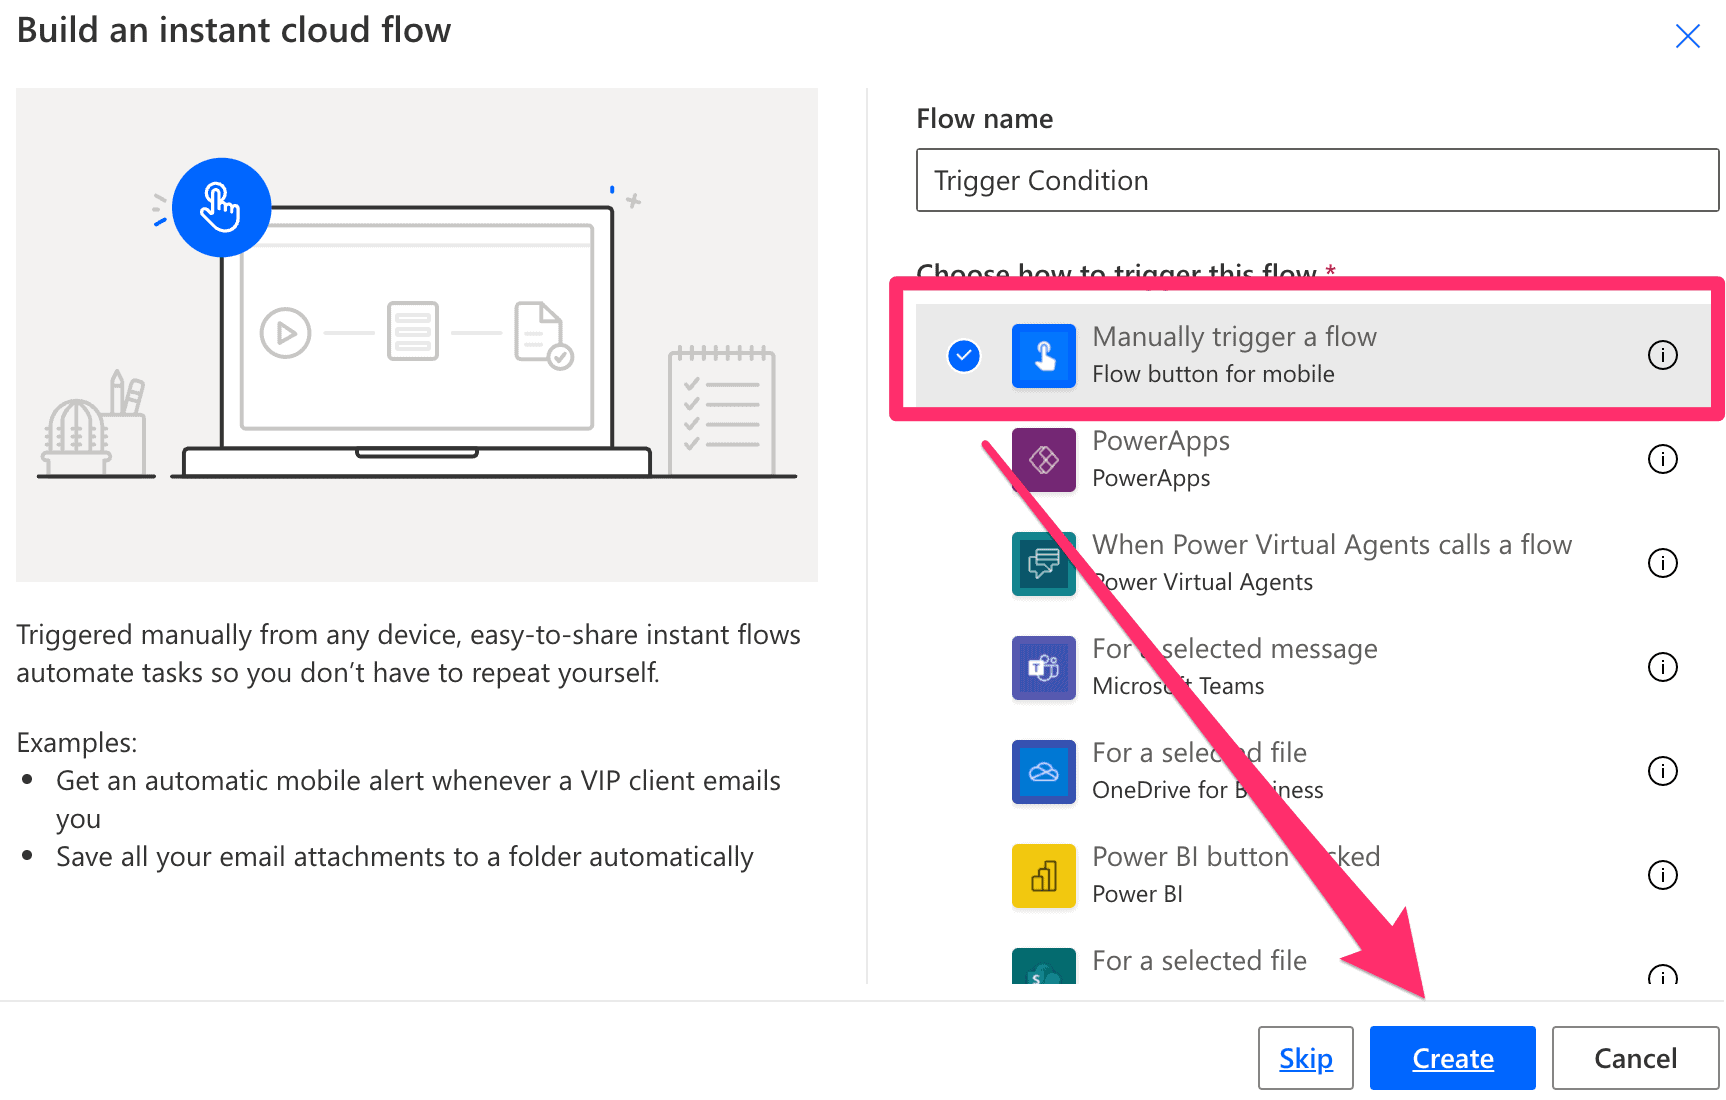
Manually trigger a flow
-
Create a Yes/No input
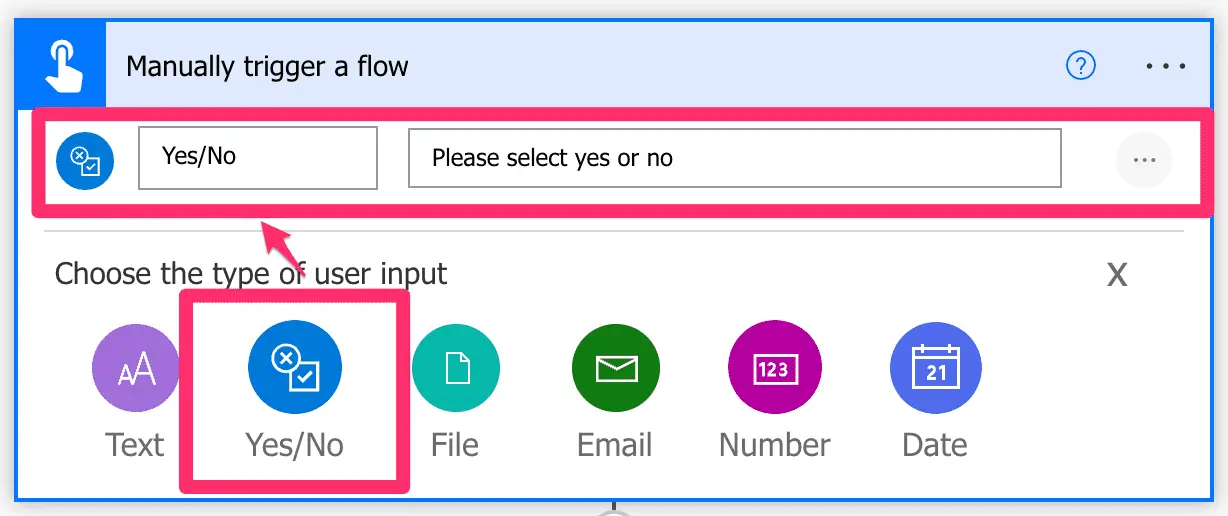
Yes/No Input
-
Navigate to trigger Settings
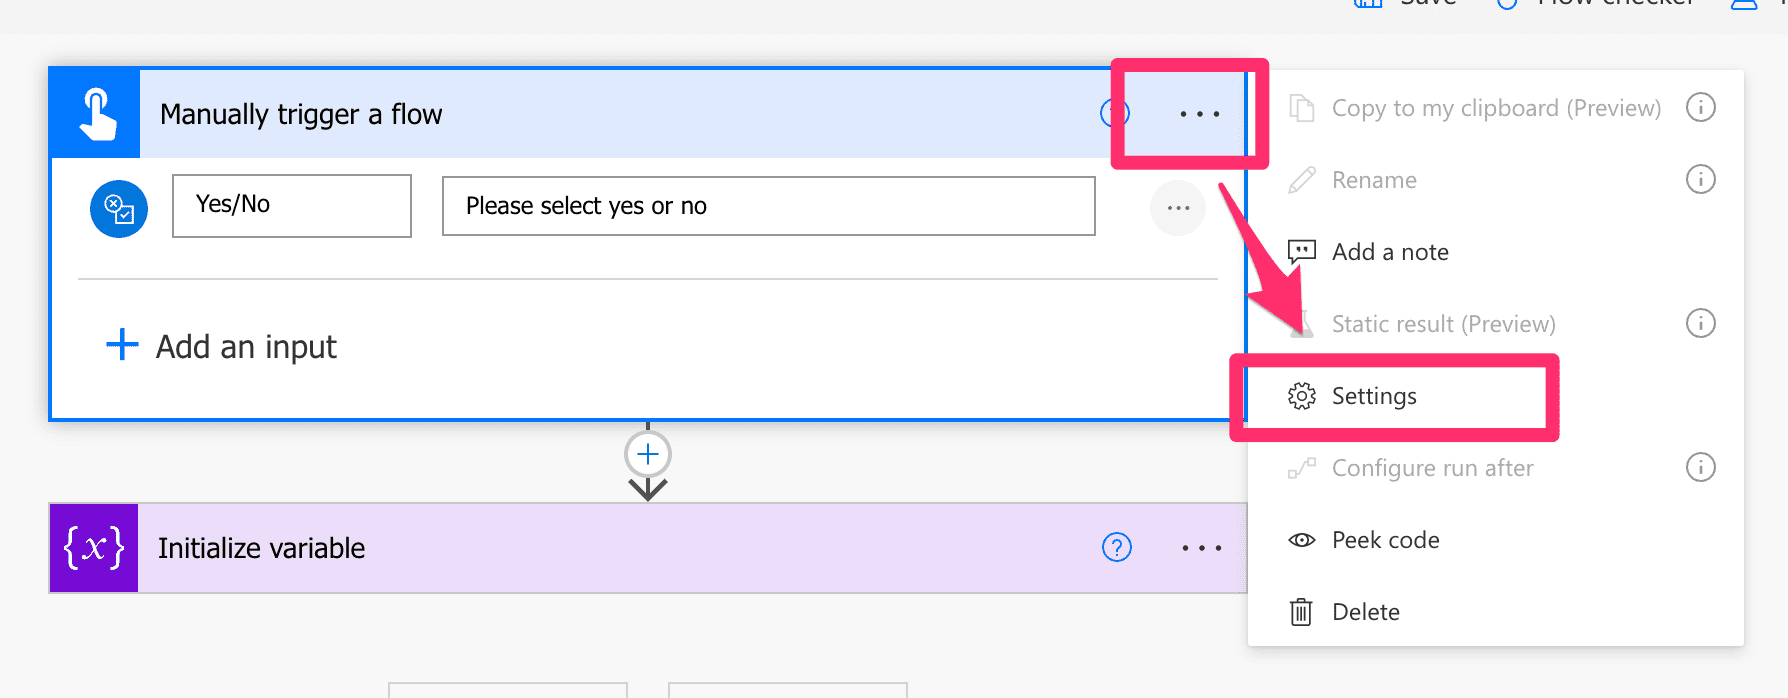
Settings
-
Create a triggger condition by clicking the ‘+’ and entering the following expression
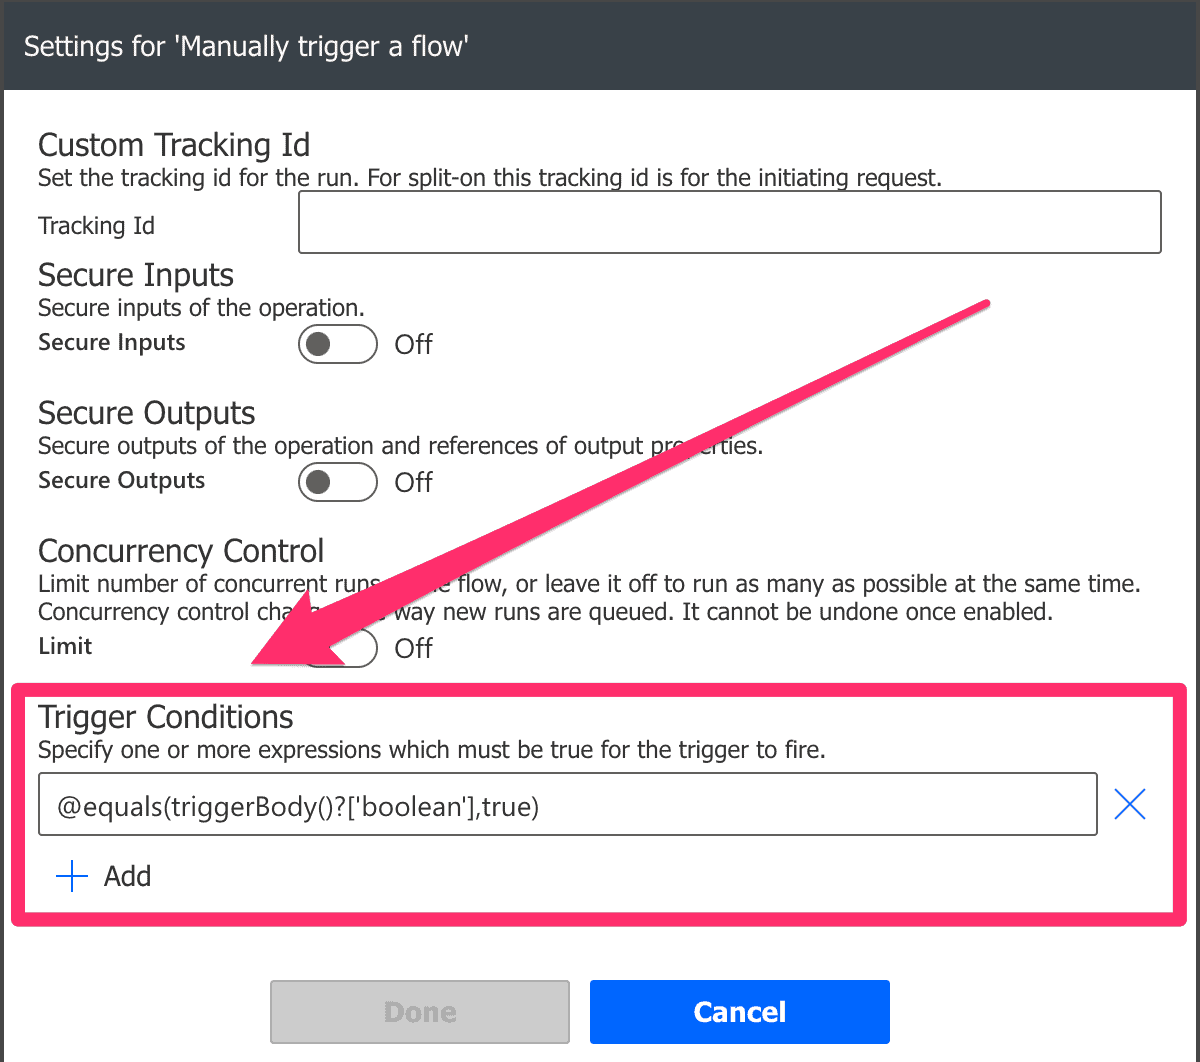
Trigger Conditions
@equals(triggerBody()?['boolean'],true)
That’s it, you’ ve created your first trigger condition. When you test the flow, the flow is only triggered when you select “Yes”. Actually the most complicated part is to provide a correct expression for the trigger condition.
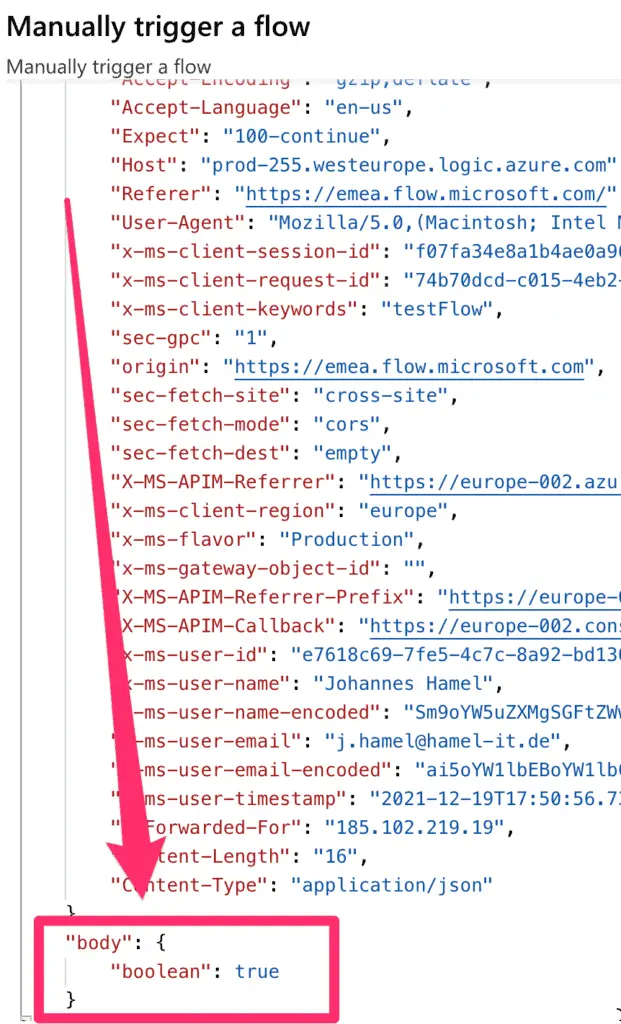
Just as a hint, to make life easier: First test the flow without the trigger condition. Within the raw output data, you find which data is accessible for your trigger condition expressions.
You can find the data this way after the test run:

